Using the HTML Editor in your Lyris ListManager™
Creating simple newsletters is easy using the HTML Editor in your Lyris ListManager.™ Below are some screen shots showing you what the icons do and how they work.
Change Font Colors:
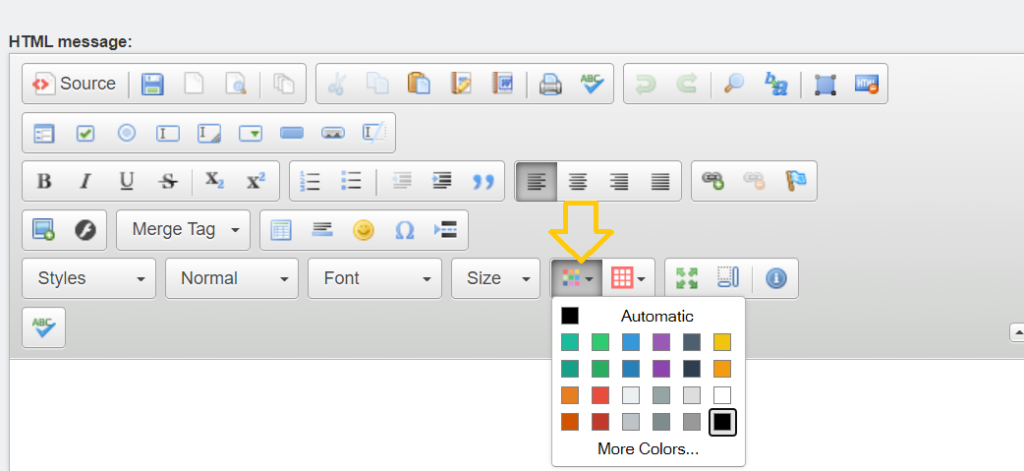
To change the font colors, type your text and then highlight it and click on the icon below with a multiple colored boxes. You will get a menu allowing you to select your color.

Select Background Color:
If you would like to have a background color in your email newsletter click on the small red table with white boxes icon. Below I have selected a “Teal” color. (Note: the color will not show until you create a table.)

Insert a Table:
Click on the “box” icon. This is for inserting a table into your newsletter.

Once you click on the icon for inserting a table, you get a new window that will allow you to set the table properties The width of the table should not be longer than 600 pixels so it can be viewed in most email clients. You can then set it for as many rows and columns as you would like and how you would like it to align.

Adjusting Table Cell Properties:
If for some reason there is no color in your table after selecting a color for your table you can adjust the “Cell Properties”. The cell is the inside of the table.

Click inside the table cell and then right click your mouse button. You will get a menu. Click on “Cell” and go to “Cell Properties”.

You will get a new window. On the bottom right you can add your html color code into the “Background Color” field or click on the “choose” button for a color table

When the color box comes up choose the color you would like for your background and click OK.

You will be taken back to the “Cell Properties” box. Click OK again. You may also set a “Width & Height” for your table cell.

Your table cell will now have a background color(s).

Insert Image:
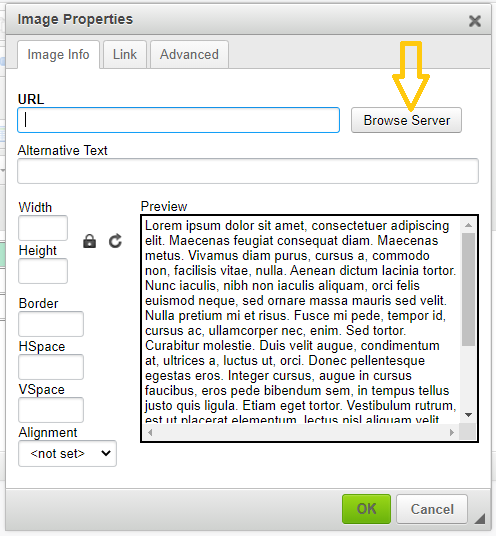
To insert an image into your newsletter content click on the “insert image” icon. This will open a new window.

Click on the “Browse Server” button.

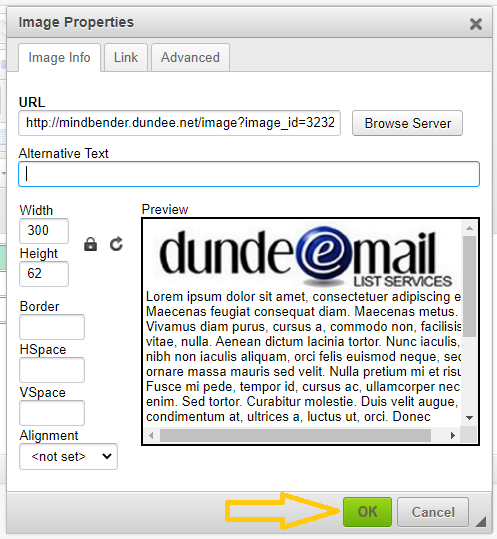
Your image library will open. Find the image you would like to use and click on the image.

You will be taken back to your image properties box. Now click OK.

Source Code:
If you are familiar with HTML you can view and edit your HTML source code by clicking on this icon

Maximize Your Editor:
Clicking on this icon will maximize your HTML editor into a larger work space.

Formatting:
To format any text content like a page “Heading” click on the “Format” box in the HTML editor.

You can also set your font style by clicking on the “Font” box.


